Engage
- Engage students in the topic through one or more activities:
- Bring in a guest speaker on climate or geologic history.
- Show a brief video on ice ages or glaciers, on the geologic history of the region students will study, or on extinct animals from the last ice age (see Additional Resources for this lesson).
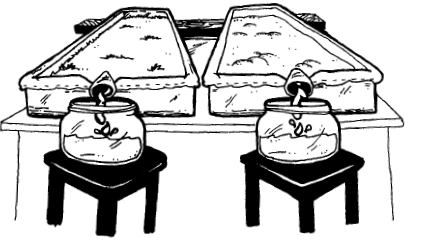
- Do a quick hands-on demonstration of glaciers, such as adding ice to water and discussing how melting ice changes the water level, or using a stream table (such as depicted) to show the movement of a river versus a glacier.
- Take a field trip to a local museum or geologic site.
- Contact a local university, historical society, or geological agency for additional possibilities.
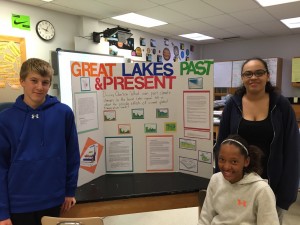
- Share the Letter from the Museum Director student page, which invites students to create an exhibit on historical climate patterns as a way to learn about current global patterns. (Note that you may choose to have students focus on the Great Lakes or another region. More Great Lakes resources can be found in the Additional Resources for this lesson.) Introduce the project’s driving question: What can we learn from studying climate history that will help us understand current global temperature trends? Explain that students will have the opportunity to research and create a museum exhibit, slide, presentation, website, or other product such as a poster, article, or brochure that will accurately address the question.
Explore
- Put students into groups of four. You can either assign the roles described on the Climate Science Project Planner student page, have students draw them from a bowl or hat, or let the students self-select their roles once they are organized into groups.
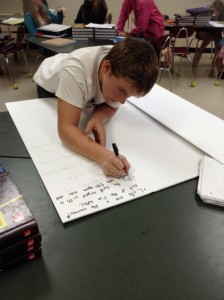
- Have students re-read the Letter from the Museum Director student page within their groups to identify what they know and what they need to know in order to do the project. They may record these items in their journals using a T-chart (as in the illustration). Be sure students begin by first writing the driving question to guide their thoughts.
Driving Question:
| What We Know | What We Need to Know |
|
|

A student fills out a T-chart about climate change to share with the class.
Photo credit: Renata Walshak
Encourage students to be as thorough as they possibly can identifying this information. As students discuss what they need to know, you may want to prompt them with important topics they may overlook. Possible questions they may have include:
- What is climate change?
- What caused the ice ages?
- What climate data is available?
- What is the concern about carbon dioxide in the atmosphere?
- What changes can happen to an ecosystem if it gets warmer?
- Copy the T-chart structure onto the board. Ask groups to share what they identified in each category and openly record their responses. Start with what they know before moving to what they need to know. Focus particularly on the What We Need to Know category, as this will help you understand what content the students may need help on and procedural questions they have. If a particular point or question requires more than a short answer from you, tell the students when it will be addressed in class.
- Share the project timeline with students (see Getting Ready), and together go over the Climate Science Project Planner student page describing the project, making sure that students understand their task. Also review the Climate Time Machine Evaluation Rubric student page, which identifies expectations for their work.
- Provide students with style guidelines for citing sources and for creating a bibliography (for example, see Purdue University’s Online Writing Lab).
Explain
- Have the students from different groups with the same roles meet together to discuss what they need to do and what to research. If possible, facilitate each role’s meeting, allowing students to decide on the specifics, but prompting them as needed. You may also help them to determine ways to gain the information, such as through stations or labs, computer research, or journal references. After the role meetings, have the original groups gather again to coordinate their tasks.
- Allow students time to research the information related to their role. Depending on your class, their research may occur in the library or computer lab, individually or in groups, or as homework.
- Check in with students periodically to help keep them on task. You may want to have students record research notes in their journals and submit them regularly for your review. You might also consider grading students on the completeness of the work at certain project check points. Be sure that students do not go astray as they are researching: it is easy for them to get too much information and become overwhelmed. Ask prompting questions to refocus their search.
- After their research is complete, have students share what they have learned in their expert roles with the others in their group.
Elaborate
-
Have groups work together to develop a plan for their exhibit, making sure that all group members contribute to the product and are familiar with their project content. If possible, have groups review one another’s plans to provide ideas and feedback. Encourage students to be creative in presenting the information, including maps and visuals as appropriate.
- Remind students of the project timeline and their deadlines for creating and presenting the exhibits.
- Allow at least one to two class periods for students to create their exhibits and to share them with the class.


